
Finally, Windows 365 Frontline Shared Mode is here in public preview. It enables great additional use-cases. It brings the whole Windows 365 offering to a totally new level. And most important, it keeps the simplicity of administration within the Windows 365 service.
In this post I’ll try to cover most important aspects: understanding the offering, setup, deployment and maintenance. As well we’ll cover licensing topics. Let’s get started…
Read the full announcement here: https://techcommunity.microsoft.com/blog/windows-itpro-blog/windows-365-frontline-shared-mode-now-in-public-preview/4300922?wt.mc_id=MVP_317618
What is Windows 365 Frontline Shared?
First of all, let’s discuss what this new offering is all about. We will also explore what it means for organizations and IT departments. You may already know the regular Windows 365 Frontline offering. It provides a great opportunity to deploy 3 machines per license. This saves costs and is especially useful if you know your users never occupy all of their CloudPC’s at the same time (e.g. ideal for following the sun workforrces).
So what’s new or what’s different about Windows 365 Frontline Shared? This new offering focuses on delivering non-personal CloudPC’s. For those familiar with it, this is comparable with non-persistent virtualization scenarios. This is great for users and workforces that need ad-hoc access to a CloudPC without the need to personalize it (e.g. install additional software from company portal, though it still would be possible technical – but we’ll cover meaningfulness of that option later in the blog when we dive deeper).
This enables a ton of new use-cases with Windows 365 and I think a lot of you have been waiting for this. So, let’s get started configuring Windows 365 Frontline Shared and cover some important aspects and dive deeper.
Licenses: Before you start, please ensure you have a couple of “regular” Frontline licenses with a desired SKU. You’ll find more details on licensing further down in the blog.
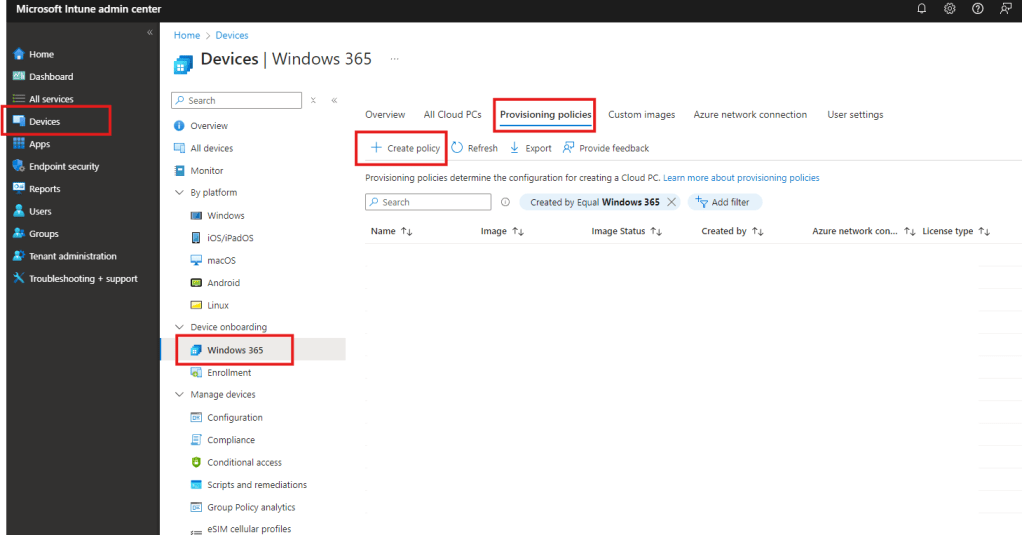
As usual, we start in the Windows 365 section in the Intune portal by going to Devices -> Windows 365 -> select the tab Provisioning policies and click on Create policy:
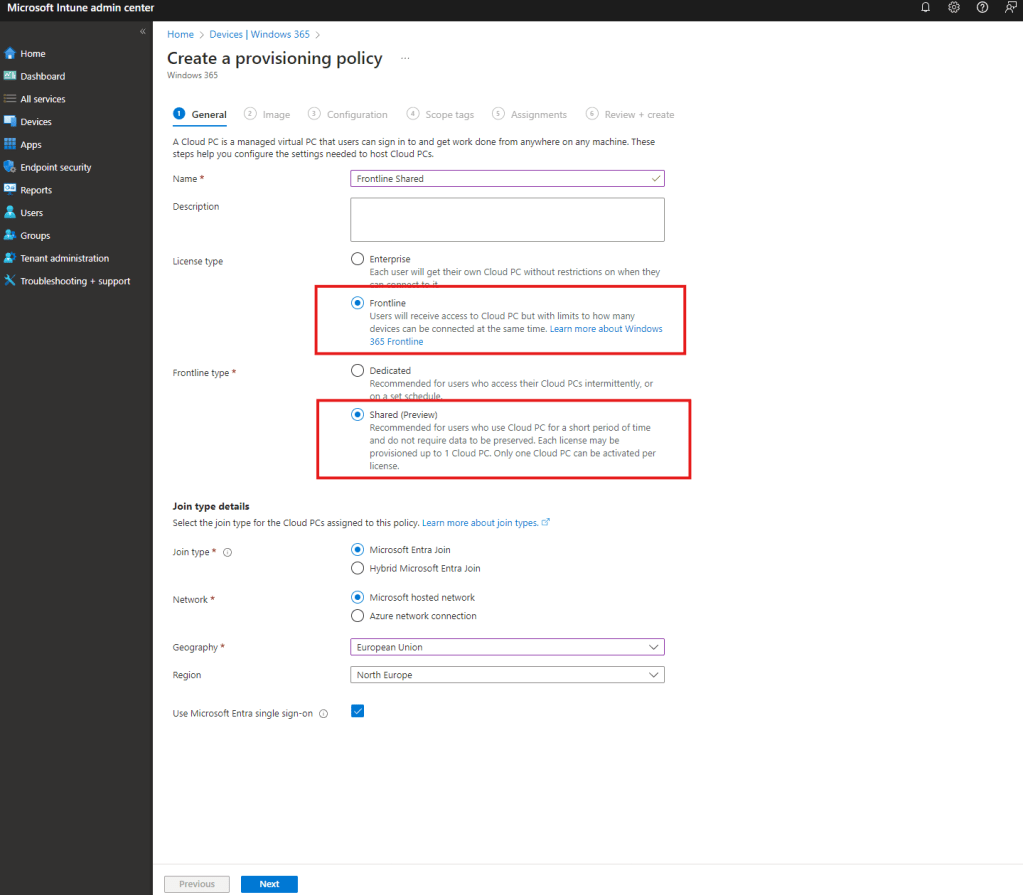
Next, let.s give it a name and select “Frontline” as the license type. Once selected, you’ll see two options: “Dedicated” and “Shared (Preview)”. We select “Shared (Preview)”. In the next steps, select the Join type, Network, Geography, Region and MS Entra sso as usual:
Note: At the moment of writing this post, the Geography and Region options are limited and not identical with the Dedicated scenario. This may have already changed depending on how many time passed and how fast Microsoft expanded the necessary resources in their data centers.
In the next step, we’ll select a Image. For the blog, I’m going to select a Gallery image. However, a custom image my be a very interesting option especially for Windows 365 Frontline shared. Consider using a custom image if you have special requirements (e.g. preinstalled software with complex configuration). I’m really not a friend of custom images, since a modern approach of “transforming” a Gallery image to your need via Intune is a much flexible and future proof way, however if you’re not there yet with Intune, a custom image may help you get started with Windows 365 Frontline Shared faster.
As mentioned, we’re going to take the Gallery Image for now:

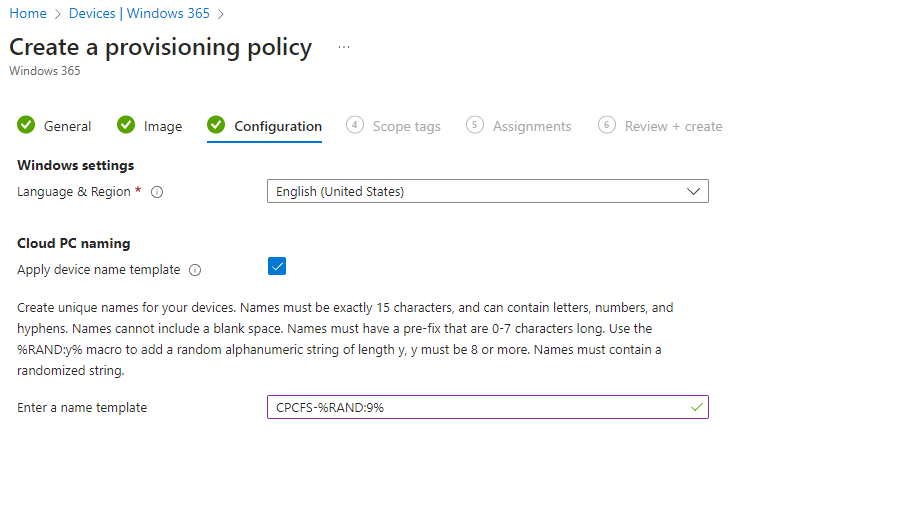
In the next step, we’ll select Language & Region and configure a device name template(if required):
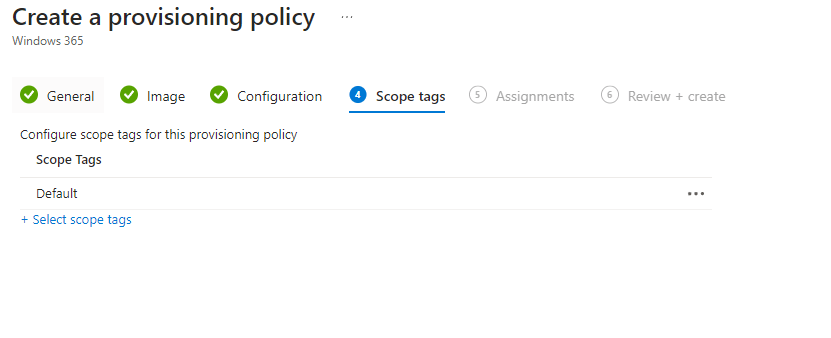
Next, select a scope tag and move on to the next step:
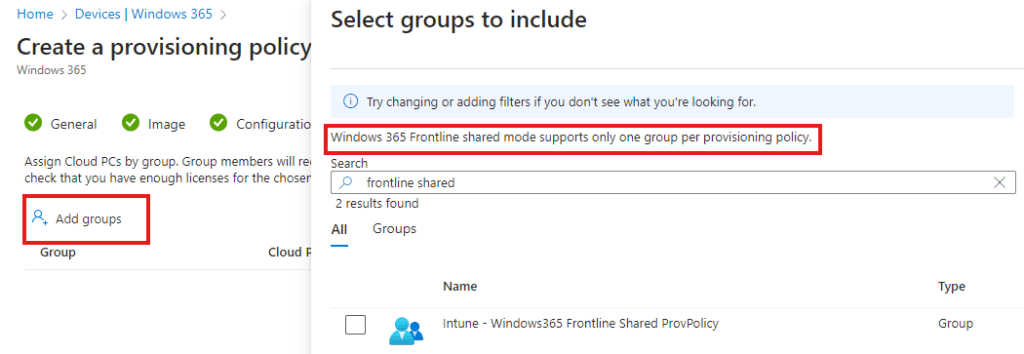
Now, in the next window we can click on Add groups and select a previously create Entra ID Group. Don’t wonder – Windows 365 Frontline shared mode support only one group per provisioning policy by design today:
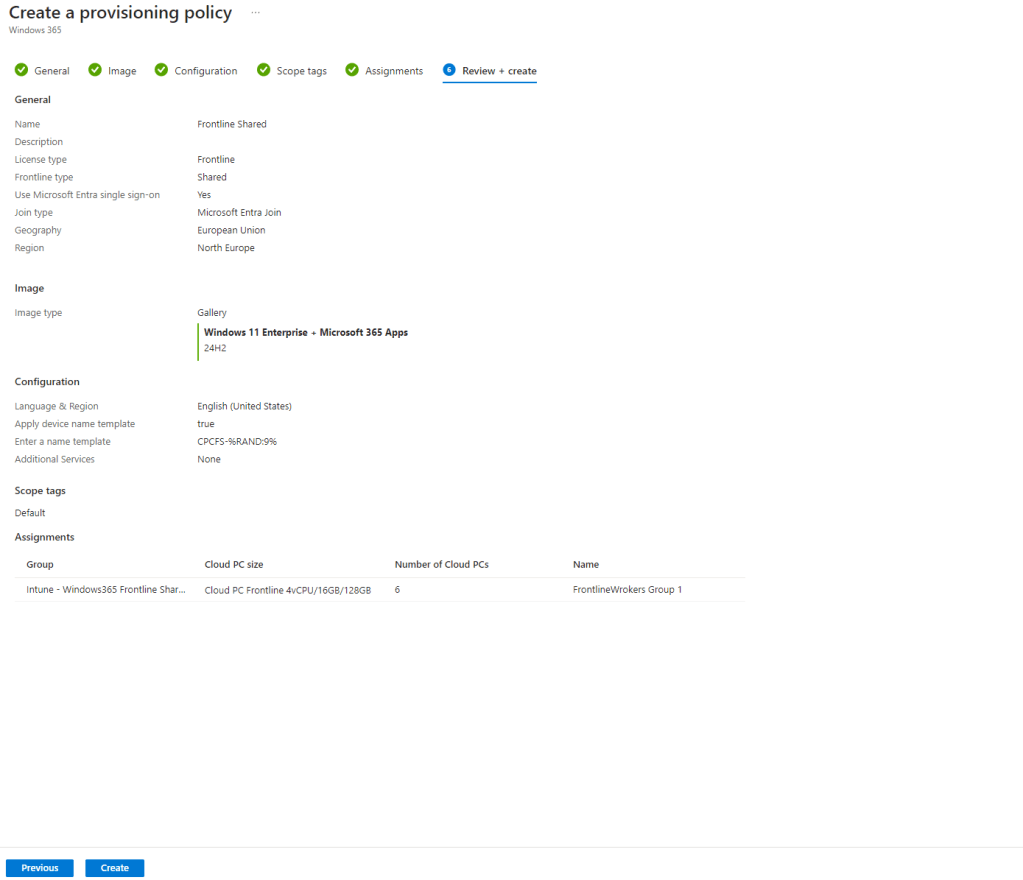
The next step is one of the most interesting parts. It’s all about licenses. Once you selected your target group, you can select the CloudPC SKU by clicking on “Select one” next to the group assignment you want to use for this policy, give the assignment a Name and define a Number of Cloud PC’s.
Important to understand: At the moment, with this offering, you can provision 1 Frontline Shared Cloud PC per 1 currently unused/unassigned Frontline license.
So, the license itself remain the same as for the Frontline dedicated scenario and you can provision as much shared Cloud PC’s as unassigned Frotnline licenses you have.

You may think – but wait a minute, where is the benefit of the whole story? The biggest advantage here is, that I can have a much larger group of people having access to this shared Cloud PC’s. Like in my example above. If you look closely on the screenshot you’ll see the EntraID group has 24 identities as total members of the group, however I have only 6 Cloud PC’s defined to be provisioned. In my case, I know this group of users have max. 6 simultaneous sessions at the same time (shift workers) – however, I have 24 people in total in this group who need that access at different times (following the sun). But again – never more than 6 at the same time.
Licensing thoughts:
I guess you understand what I’m getting at…. With this offering, we save 18 Frontline licenses. Before this offering, I’d need to equip each of this persons with a Frontline dedicated machine. Frontline dedicated is also a very valuable option – however, for this target group it’s simply not the right one. This group of people need a ad-hoc access to a W365 machine to perform some special tasks. No need for customization or any additional, personalized software product installations.
Let’s move on. Now, that we understood what licensing means in details for this offering, we can finish creating the policy by reviewing it and click on create:
Once clicked, the service will start provisioning the machines required behind the scenes. You can view the progress by moving back to the All Cloud PC’s tab, removing all predefined filters and selecting a new filter like this:
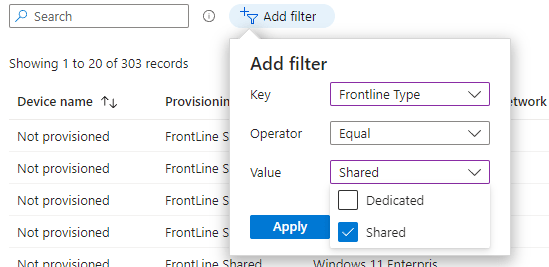
With that filter, we can now see our 6 machines being provisioned at the moment:

Filters, dynamic groups and assignments:
While the machines are provisioning, we can use the time to create a dynamic group or a filter that can be used for assignements. For the blog, I’ve created a dynamic device group in Entra as shown in the screenshot:
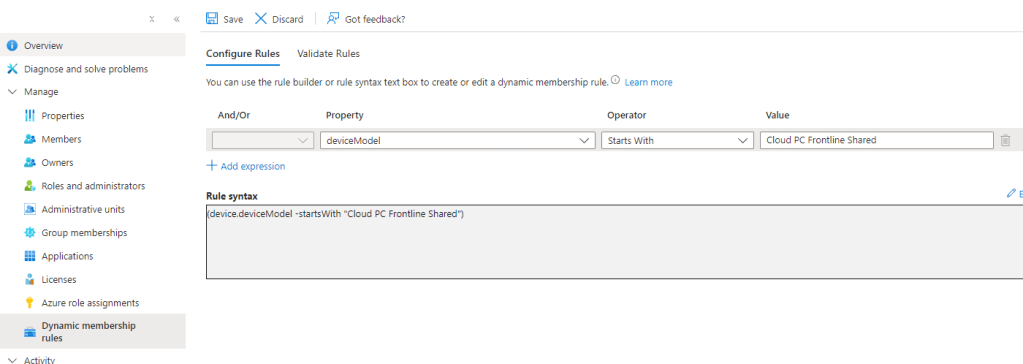
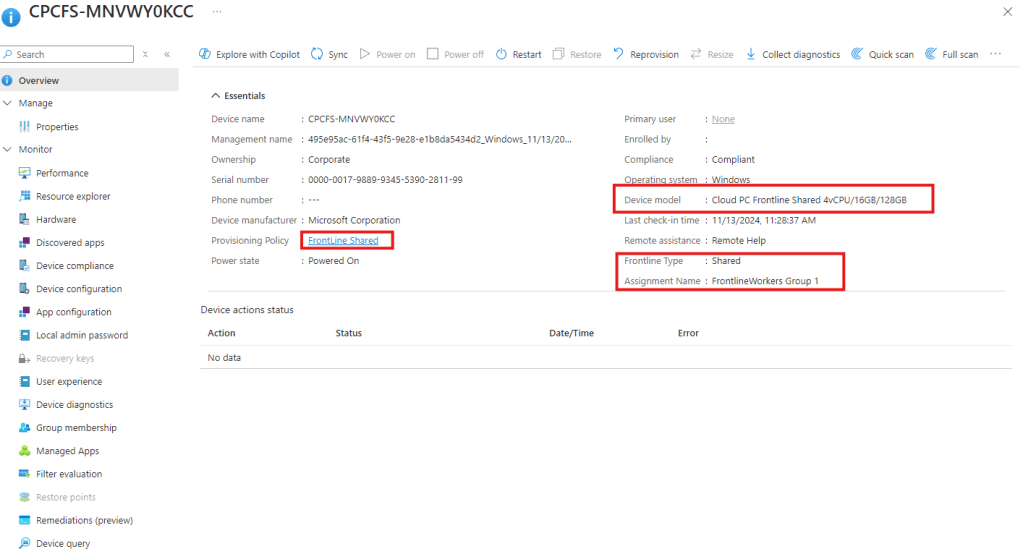
With that dynamic group, we can make sure to assign necessary apps in Intune as required for this machines. This will ensure our Frontline shared Cloud PC’s will autoamtically get the right software installation automatically, once they finished provisioning and are up and running. In case you want to use filters, take the Device Model object to tune your filter for this Cloud PC type accordingly.
Meanwhile, our machines provisioned successfully and this is how a Frontline Shared Cloud PC look like in Intune:
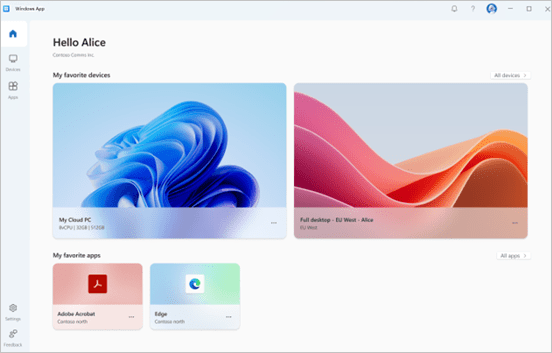
Now, it’s time to take a look from a user perspective. Start your Windows app and you’ll see a new machine with the type “Frontline Shared”.
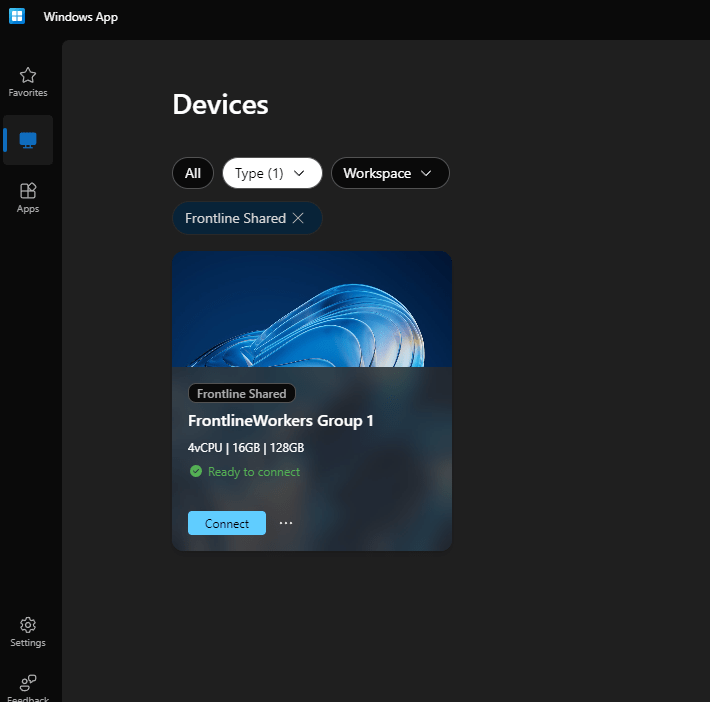
Let’s click on Connect and see what happens. We’ll get singed-in automatically, since we configured our provisioning policy to enable sso.
With my standard Intune policies (auto sign-in for Edge and OneDrive and known folder sync/redirection), I have my personal settings and environment available in seconds and can start performing my work.
A very beautiful feature for IT-Pros here is the ability to re-provision all of the endpoints related to this provisioning policy. To do so, move to the Provisioning policies section in Intune and click on the previously create provisioning policy. In the top left corner, you’ll see the Reprovision button:
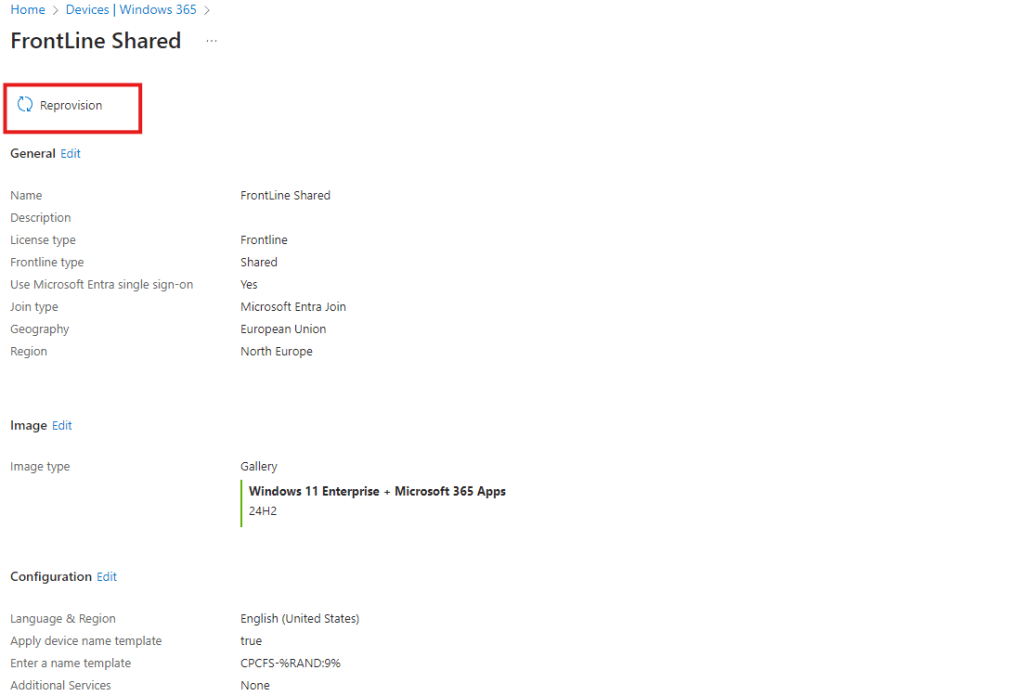
Once you click on the button, you’ll see the option to define a percentage of devices to keep available during others perform the rerpovisioning. The available devices(20% in my example) will reprovision as soon as the 80% completed the reprovisioning task:
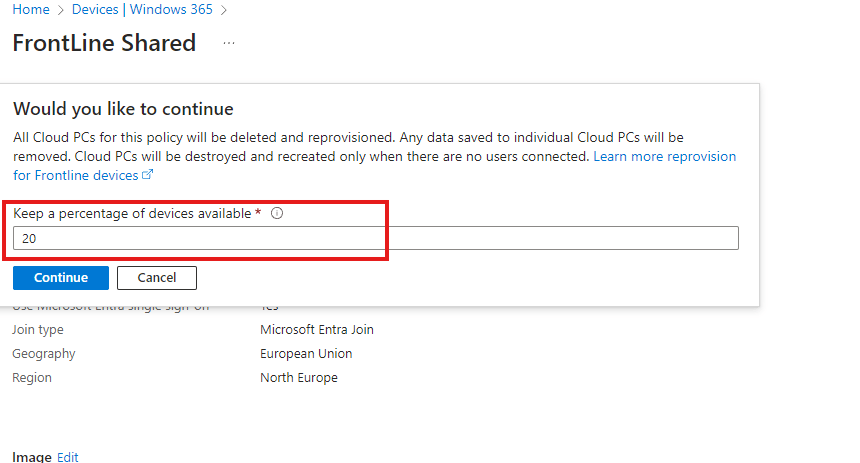
This is especially useful if you adjusted something in your provisioning policy or in case you want to revert all the shared Cloud PC’s to a fresh state on a regular basis (e.g. once per week).
Note: At the moment of writing this post, it requires you to change the OS Image within the policy to ensure the system does a full reporvision. If you just change the name, it will not fully reprovision the Cloud PC’s related to this policy.
User data and profile:
User data and profile is being cleaned up automatically by the service behind the scenes after a user signs out of the session.
Reporting:
To keep the post short: Microsoft covers reporting in the already known Connected Frontline Cloud PC‘s report and will bring further enhancements to it soon. Read full details here: https://learn.microsoft.com/en-us/windows-365/enterprise/report-connected-frontline-cloud-pcs?wt.mc_id=MVP_317618
Conclusion:
Windows 365 Frontline Shared provides amazing and flexible options to extend your Windows 365 footprint by allowing even more flexibility. It is ready for a lot of use-cases like hot-desking, shared frontline worker scenarios and much more. I can’t wait to see what other enterprises are going to use it for, as the capabilities are great and efficient. Setup and administration is intuitive and easy for IT Pros, as you work with your familiar Windows 365 environement and it fits great in the whole concept of Cloud PC management within Intune. And the value from the cost perspective is just great!
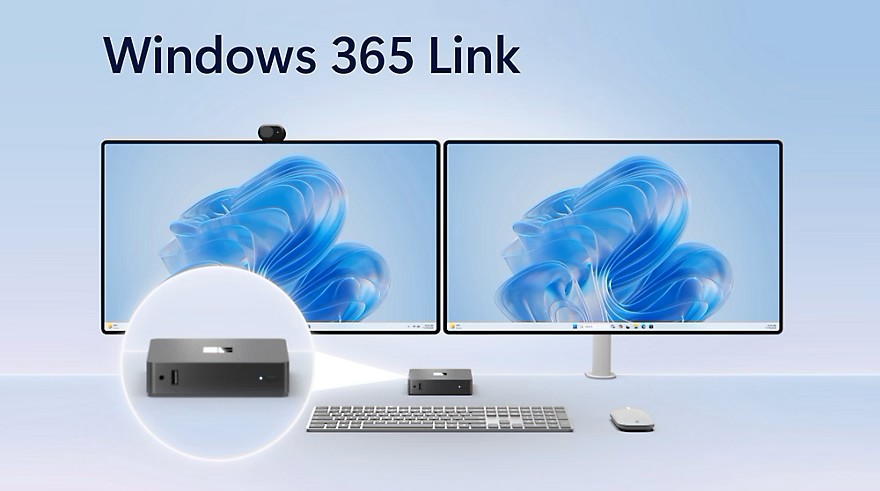
And this is just the beginning. I can’t wait to see further features and improvements coming to Windows 365 Frontline Shared and Windows 365 in general. Stay tuned for my next blog post which will cover Windows 365 Link and in case you can’t wait – read the announcement for Windows 365 Link from today here: https://techcommunity.microsoft.com/blog/windows-itpro-blog/windows-365-link—the-first-cloud-pc-device-for-windows-365/4302687?wt.mc_id=MVP_317618


Leave a Reply